Before our Friday online teaching class I tweeted out a request for suggestions for the ONE THING that people would send someone if they were moving online for the first time.
If you were going to send someone ONE document/video about teaching online, what would it be? Looking for 'further reading' suggestions for our online teaching course.
The response was amazing. There are so many great educators out there doing good work right now, and so much good work that’s been done that is super useful to the situation we are all in. I have made an attempt to grab some of these links and put a little context around them so that people can skim through them. It’s the least I could do. Many folks delete their tweets nowadays, and looking through a twitter thread can be exhausting. I’m sorry if I missed your tweet. You can just add it to the end of the doc. I’ll check occasionally and sort them.
And just in case you were wondering about video… here’s a list of providers of simple video. Haven’t gotten a chance to break this one down yet. Maybe next week 🙂
So… I need a SUPER SIMPLE video creator. Needs to record face and screens. I want it to record to my computer. I don't want ANY power. OBSstudio has too much power. Openshot has too much power. Thoughts?
It seems I struck a bit of a chord with my fellow educators as I sat in my basement at about 7am trying to figure out how to fix the design of the course I’ve been working on with my colleagues at the Office of Open Learning at the University of Windsor.
Designing a course to teach people online… to teach online… when
1. those people don't have a pile of time 2. we have hundreds to teach 3. They never intended to teach online
is the hardest educational task i've ever worked on.
The task is a daunting one. It kind of reminds me of mandatory tech training that Bonnie and I have offered in k12. Here are a group of smart people, who have spent their lives teaching, who you need to make very uncomfortable before they are going to start feeling comfortable again. Those people expected me to show them how to make the machine go PING! and I was there talking to them about abundance and complexity. Exact same scenario this time. Day 1 feedback was (not entirely, but enough) “We didn’t even learn to DO anything!”
Plus. We had to do it online. Teaching online learning online is hard. Just sayin’.
We did make some adjustments based on that (and other) feedback. We reorganized what we were going to do on day 3 and 5. I’m going to do my best here to record the lessons that we learned in the first week. I will say… they are hopeful lessons to me. While exhausting, it was probably the most rewarding week of my educational career. I am left, once again, very thankful to Nick Baker for allowing us (and probably defending me in all kinds of meetings) to stick to our guns and do the course this way.
Lessons learned from our first COVID19 Online Teaching course taught online
stick to your guns. Teach pedagogy Teach care. People understand the need right now Treat smart people like they're smart. Teach online concepts, not how to make the machine go ping
I have a starting premise in doing this kind of work that there is no definitive research in education. I know people tell me I’m wrong, but it might as well be true when we’re working with people who are mostly not going to dig into the research. I can find research to support pretty much any position in education, I mostly chose not to for this course. YMMV
We started by introducing the idea of affordances. The internet fundamentally changes what is possible when it comes to learning. When we were still under the tyranny of paper, our access to diversity of perspective was hugely limited. Our ability to be flexible in what we were going to teach and learn were limited to the texts we could order into our classrooms and the things crammed in the heads of the learners and the teacher.
This has changed.
Information is now abundant. It provides an amazing opportunity to allow learning to be something that emerges from people outside of the textbook/teacher/student nexus.
The tool we used to contextualize this abundance is Dave Snowden’s distinction between the complicated and the complex. In situations that are complicated, it makes total sense to just go identify a resource (a person/text/video etc…) that can explain the step by step, complicated concept. When things are complex, however, the abundance of the internet provides an amazing swath of opportunities.
The third day we talked about how working indigital spaces is fundamentally different. We need to consider how we communicate our humanity- what is a smile in an online course? We need to think about how to give instructions so that they provide context. Martin Weller talked about how setting up roles in a group might take 5 minutes in a live classroom but might take a week when working asynchronously.
We talked about how some things are done better asynchronously than synchronously online. If you’re just going to be telling someone something, record it, send them a paper or something. No need to have someone live just listening to you.
We also talked a ton about different ways to communicate ideas.
The last day we talked a great deal about doing formative and summative assessments online. How with formative assessment you need to find a way to see people’s work early and often (by using iterative assignments for instance) so that you can provide formative help. In a f2f classroom you might be doing that all the time without realizing it, online you need to be more deliberate about it.
We talked about the weakness of online spaces for summative assessment, particularly for MCQ style summative assessment. We talked about the technical, pedagogical and ethical challenges of doing that and what alternatives might be considered to get there.
On the asynchronous days we encouraged people to think about how they syllabus was being constructed.
How to do introductions.
How to work with the library to get resources
How to think about your curriculum
Thinking about the connection between content and assessment in digital spaces
How to provide group feedback
The technology
While I definitely believe that the concepts are more important, digital spaces are, well, digital. The design of the course has learners doing assignments, discussion board work, working in collaborate, doing tests etc… all while discussing the concepts (in Blackboard). The idea is to give people practical experience using the tools so that when they search/ask for advice, they have the context that they need. We’re NOT going to have time in a one week course to teach people how to fix the settings in the gradebook.
Breakout groups
We did 3 3-hour live sessions. They were exhausting. But we did do some guided breakout groups. We actually broke them out into groups of five and had facilitators guide people through the process of search for Creative Commons images and resources. Those went well. We also used the breakout groups to let people process their feelings about the #onlinepivot. People are upset. It’s important they get a chance to be heard.
Other notes
We need to work harder to make better use of the asynchronous days
We need to make it MORE clear EARLY that we aren’t ‘explaining technology’
I modelled ‘establishing a social contract’ excessively. Made my
I performed a number of different models and approaches to show how you could work with students
They got it. In one week people went from being nervous, sure they were going to do 2 hour live lectures every week and thinking they wanted to make the machine go PING! to thinking about how they could have a great class online. Like they really got it. We treated them like smart people, told them they were going to have to figure out the tech, supported them as much as we possible could and talked all day about pedagogies of care… and they got it.
I mean. I’m sure some of them had that coming in… but there were people who made the whole transition. It was a long week of late night and early morning planning with Alicia, Ashlyne and Nick… but we made it. Looking forward to editing our design this week. I’ll post the final version after we refine it.
When i started doing the videos for #oliah I was trying to put into words the things I’ve learned about working online. Many of those were hard lessons learned from experience, more of them are lessons that i’ve learned from the excellent educators and students I’ve had the privilege of working with in the last 20 years or so. The video series isn’t really intended to directly prepare someone for teaching on the internet, but rather put some concepts together so that someone can round out their preparedness.
Now, however, we at UWindsor Office of Open Learning (OOL) find ourselves facing the idea of ‘teaching teachers to teach online,’ not for few final weeks of emergency remote teaching, but for a term. At least. Tomorrow we start a course for faculty moving their courses online for our Spring/Summer session.
There are other people more qualified, definitely, and more reflexive, probably, to try and create a course for people who now have the need to go and teach online in what remains a hurry… but here we are. Fortunately this course won’t just be designed or taught by me: all my OOL colleagues have been supporting faculty flat out since the #pivot began, and together we’re a committed course team. Shout out in particular to co-designers Ashlyne O’Neil and Alicia Higgison, who’ve led the course idea from the get-go. Thanks, dudes.
We’ve been wracking our brains for right place to start. Should we be trying to swing for the fences? Do we want to start with comfortable certainty to bring people onside or push people with new concepts to set a tone of uncertainty, making room for growth? Do we come out technical or conceptual?
Ultimately, we end up coming back to what I always advise other people to do and find SO hard to do myself – examining our collective goals. So here’s a quick lay-out of our plan for the UWindsor Online Learning in a Hurry course.
(Caveat: the course is a collective effort, but this blog post is from my perspective and my colleagues are not to blame for any dumb stuff in here.)
Thinking about Goals
So… I don’t know the people who are going to be taking this course. I mean, I probably know a couple of them, but broadly speaking, I don’t know them as people. I don’t know what their level of Internetness will be. I don’t know how they feel about what education is. Some will likely be sessionals and some will be 30 year faculty members. The one thing they all will likely share, is that they have to teach someone in the Spring session online. That… is soon.
The course itself is going to happen in Blackboard (our institutional LMS). That decision is taken out of my hands… but I probably would have chosen to do this anyway. No need to insert another point of complexity at this point. The work we are going to do in Blackboard over the 5 day course will do most of what’s needed to give them a sense of what is possible in the platform… though I wont be ‘teaching’ any of the technology. We have great people doing blackboard support on campus and I’m a big believer in people learning the tech for themselves.
I want this course to be conceptual and the technology to be incidental
So. That decision made, the question becomes – what are the concepts that I think I’m going to want to include. I say ‘think’ because I only really script out the first day. I’ll see after day one how things are going, where the learners fit on the various spectrums of literacies and skills, and how much I think we can actually do together.
The ‘design’ of the course
I am NOT an instructional designer. I have designed a great deal of instruction, but, the same way that baking doesn’t make me a baker, designing instruction doesn’t make me an ID (hence the scare quotes in the section title). That being said, I’m more than happy to impose my own conceptual conceits upon my fellow teachers. The course is setup as follows –
Synchronous times, Mon/Wed/Fri – 9-12. Each synchronous session is broken into two blocks. They are (currently) titled as follows
Introduction to Online learning
Thinking through course goals online
Finding content (includes learner/web as content)
Creating content (includes lecture/text etc…)
Assignments and assessments
The student experience (reflection on their experience in the course and what that tells them about how students will experience it.
Blocks
Each of the blocks is designed as follows:
Opening mini lectures establishing common language and concepts (Blackboard collaborate) 15min
Break out groups for faculty to discuss with other faculty (they will be keeping notes on a powerpoint that will be used for feedback in the main group) 15min
Feedback (using the slides created by the faculty in the breakout groups) 15min
Assignment (submission of assignment using blackboard assignments) 45min
Participants uncomfortable with the assignment can stay back in the live session for further direction. Participants may return early to discuss issues in greater depth until next block starts.
Asynchronous days Tuesday and Thursday
The asynchronous days will involve some options for content and some challenging questions for use in the discussion forums. Participants will be encouraged to both start threads in the discussion forum and respond to other participants. The first asynchronous day our contributed content will be this contribution sent to me on twitter by @thestacylynnhttp://libguides.lehman.edu/oer and this video we recorded with our excellent librarian friend Scott Cowan.
That first lecture
I think i basically want to do four things in the introductory lecture… which is probably too many, but why stop now? The first think I want to do is give them a fair idea of what they can expect form the course. If they’re expecting me to teach them which button to press to make the machine go ping… they are going to be very disappointed. so…
Introduce the social contract (both for this course and as a concept)
The second thing i want to do is introduce the distinction between complicated and complex ways of knowing. This is a distinction I’ve written about on this blog a 100 times, stolen from Dave Snowden, and I find it a critical concept to introduce in education. There are some things that are step by step things that you need to know – those are complicated. There are other things that no one really agrees about, but everyone in a given field of knowledge have a sense or (or an opinion about) those are complex. When we teach we inevitably do some of each. Online… they are very different beasts.
Introduce the distinction between complicated and complex
The third thing I want to introduce is the concept of information abundance. Working on the internet breaks the wall of control that a faculty member has over the knowledge in a course. Our education system and our face to face classrooms were designed for a world of information scarcity, where a student needed to come to class to acquire the knowledge in a faculty members head. We now have limitless ways of acquiring information, some of it good, some of it not so much. Teaching online allows for us to integrate this new reality into our teaching
Introduce the idea of information scarcity and abundance
The last thing i want to do is address the human concerns that the participants are likely having about teaching online. I’ll do a couple of live slides, an approach i’ve been using for years, to allow the participants to reflect on their own thoughts and concerns regarding their upcoming teaching assignment. I’ll ask them what they are concerned about teaching online as well as what opportunities they see.
Give learners a chance to process their feelings… introduce student created content through liveslides
Group Discussion
This is a simple breakout group where faculty will be discussing the questions brought up in the liveslides. I want to give them a real chance to talk about their concerns. In order to make sure we’ve got that feedback, we’re going to have other OOL staff in each of the breakout groups keep notes on a powerpoint deck, each facilitator using one slide per question per group. When we all come back to the main room, I’ll lead a discussion based on the notes on that slide deck by using a screenshare of the shared powerpoint deck. We’ll have support in those breakout rooms for the second part of day one, but allow it to be participant lead for the Wed and Fri instances.
Assignment
The assignment submissions are going to an iterative version of a new syllabus. The first submission will just be a word doc with some headings (and their name on it) and after that we’ll start to include new things each day. From an assignment perspective, the work is to keep adding to a syllabus based on realizations that learners are picking up each day.
Tests
We’re also going to use the testing module for participant feedback. I like to offer lots of opportunity to do learner feedback and this seems like a nice way for participants to experience what a student experiences using the testing section of blackboard.
Goals
So after all that… what are my goals for the course? I want participants to experience an online course that is more than videos and MCQ. I want them to experience the difference between a live structured learning experience and an asynchronous open ended learning experience. I want them to get some sense of how many options there are for communicating their field to learners, and think about what impact that has on what and how to assess. I want them to come out of the course with a start on their syllabus for the spring with some ideas about how they are going to imagine their Spring student, and think about what they can do to make that learner’s experience a safe and interesting experience.
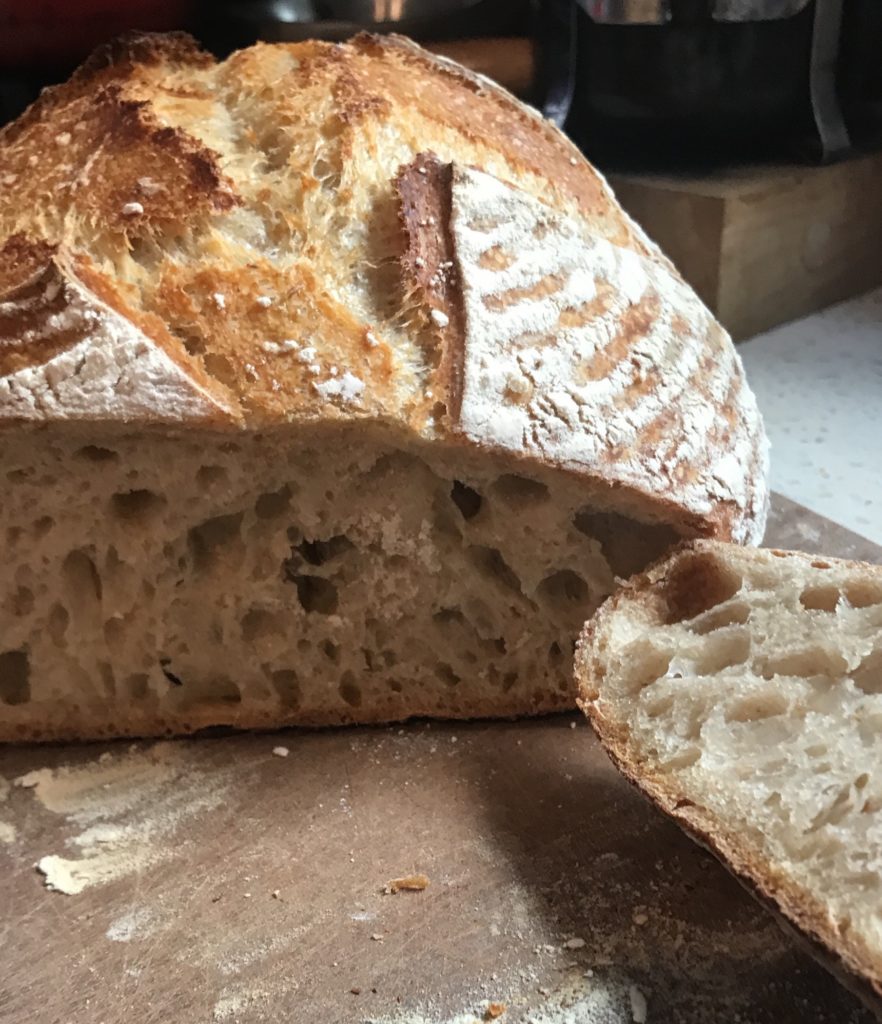
I have a bit of a problem. Once I get an idea in my head, I tend to want to get to the bottom of it. This fall I decided I wanted to make sourdough bread. I wasn’t able to follow any particular recipe online because, well, I didn’t know enough about bread. I also wanted a recipe that allowed me to be super lazy about it. I am no baker… but now I can make bread. So here’s what I ended up with.
I made 7 or 8 breads that were – not perfect. They started out flat. I only threw one of them out but they all basically tasted good. Number 9 was nice and puffy. A half dozen people have followed these directions and have made good bread. I encourage you in the belief that bread is more art than science. Differences in water, in the yeast in your starter… it will all impact your bread.
If you don’t have starter… or don’t know what that means, please go to the starter section at the bottom of the post. Otherwise, go ahead and give it a shot. These instructions are meant to be followed by people who don’t know anything about bread. Lemme know if something needs more explanation.
8am (ish)
Mix 115 grams of Whole Wheat Flour and 115 grams of water into the starter in the morning (maybe a little more if i’m making more bread)
5pm (ish)
In my mixer (or by hand or whatever. In a bowl dammit) 230 gm of starter 650 gm of water (blood temp) 1000 gm of bread flour Salt (i use two small cupped handfulls… maybe two large tablespoons?)
Mix it until combined. Note: we are not kneading this. Let sit 30-60 min
(stretching instructions are here https://youtu.be/vmb0wWKITBQ?t=417 you should really watch this video)
Shape it into a ball
Let sit (covered in container) 2 hours
8pm (ish)
Put a thin film of water on the counter.
Dump the dough onto the counter, sticky side up
Get your hands wet
Get your dough scraper wet
Stretch the dough 4-5 times
Shape it into a ball
Let sit (covered in container) 2 hours
10pm (ish)
Put flour on your counter and on the top of your dough while its still in the container
Dump the dough onto the counter, sticky side up
Cut dough in half, stretch dough 4-5 times
Make into two bread shaped balls.
Let sit side by side (covered by towel on counter) one hour
11pm (ish)
Put flour in your dough shaping container (i use a banneton, you can use a bowl)
Shape dough, put in container sticky side up (banneton/bowl/bread thingy)
Place, uncovered, in the fridge
Next day, maybe the day after. At whatever time.
Preheat oven and dutch oven to 510 degrees. I put my dutch oven in the oven with the cover off slightly. I don’t really know why. (about half an hour)
I also put a cooking stone under my dutch oven to deflect the heat. I find that the direct heat over cooks my bottom crust.
After its heated, remove cover from dutch oven. (it will, you know, be hot)
Dump bread out of container onto semolina covered baking sheet. Hope it doesn’t stick. If it sticks, you didn’t create enough of a skin in the stretching phase.
Slice bread at random, maybe 1cm to half an inch deep along the bread
Put in oven immediately. No dawdling. Move it.
Put the cover back on the dutch oven. Cook 22 minutes
Remove the bread from the dutch oven and put it back in the oven naked.
Let cook 5 or 10 or more minutes.
Keep checking the bread until you’re happy with the crust.
Then, you know, take it out of the oven.
Notes
Blood temperature water – i test the temperature of water with my fingers, i’m looking for the water to be about my body temperature. Proving temperature – Apparently if you prove at room temperature, less sour. If you prove at 80 degrees, more sour. https://brodandtaylor.com/make-sourdough-more-sour/ Pizza dough – I basically use this same recipe (with olive oil added and some super heavy kneeding at the start) to make pizza dough. Put it in the fridge COVERED on day 1, and take it out 2 hours before using.
Starter
Well. The easiest thing to do is get some from someone. You can also make your own.
Get a big glass jar with a closing lid, remove the rubber seal.
Add equal parts of water and flour (maybe 50grams or each…i used whole wheat) for about ten days, dumping parts of it out of the jar so that it doesn’t overflow.
You are done when your starter doubles in about 6-8 hours.